
1. Does not out put ink
The steps for troubleshooting as follows:
⑴. Check whether lack ink in the ink cartridge, and do not tighten the ink cartridge cover
⑵. Check whether the ink tube clamp is open
⑶. Check whether the ink sacs are installed
correctly
⑷. Check whether the print head are aligned with the ink stack caps
⑸. Check whether the waste ink pump is working well
If there are no problems, it may be that the print head channel is blocked, and the print
head needs to be cleaned in time
2.Print head cleaning
⑴. Use the head cleaning and ink loading function in the control software for automatic
cleaning.
After each cleaning and ink loading, you need to print the head status to check the cleaning
effect. This operation until the nozzle status is well.
⑵. If the effect of head cleaning and ink loading are not good,do ink pumping cleaning.
When the carriage is in the initial position, use a syringe and tube to connect to the waste
ink tube to forcefully extract about 5ml of ink (note that during the ink pumping process,do
not allow the inner cylinder of the syringe to rebound, which will cause color mixing in the
head.) If the ink stack caps are not tightly sealed during the ink pumping process, you can
gently move the carriage to ensure a good seal between the head and the caps. After the ink
is drawn, use the head cleaning and ink loading function again.
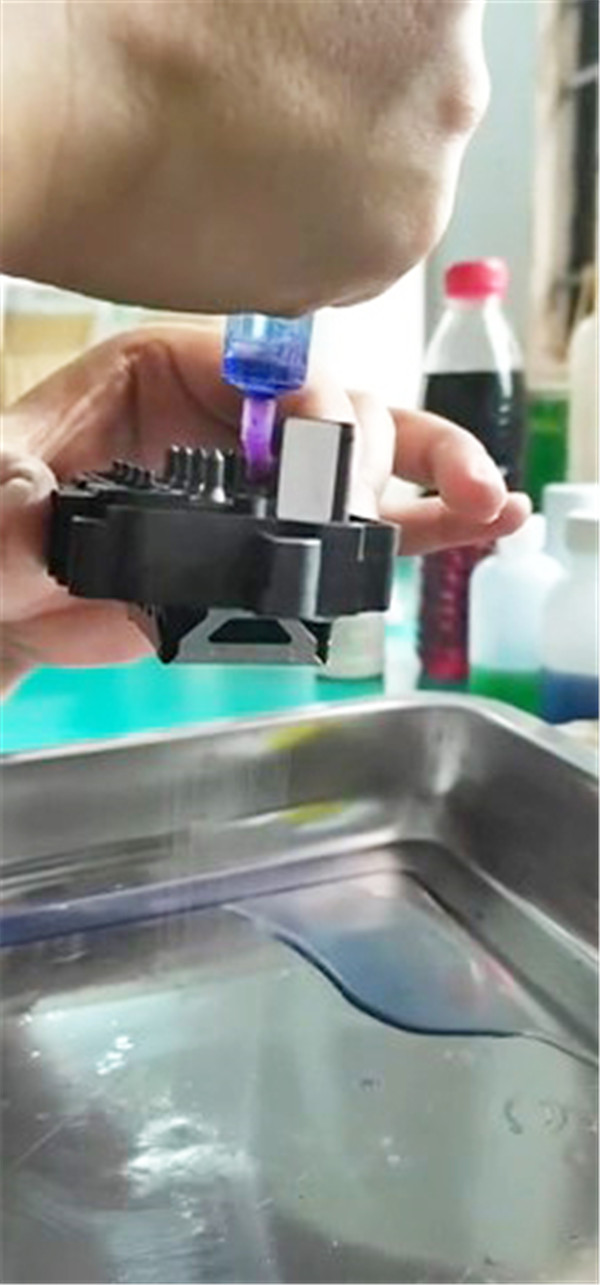
⑶. Injecting and pumping cleaning: remove the carriage, place a non-woven fabric under
the head, close ink tube clamp, pull out the ink sac, and connect the syringe with cleaning
liquid to the ink channel of the head by the tube, and push the syringe with proper pressure,
until the head sprays a complete thin line vertically.
⑷. Print cleaning: Use "cleaning liquid" to replace the ink that has blocked channel, print the
pure color block of that color, and replace the original ink when the channel block is cleared.
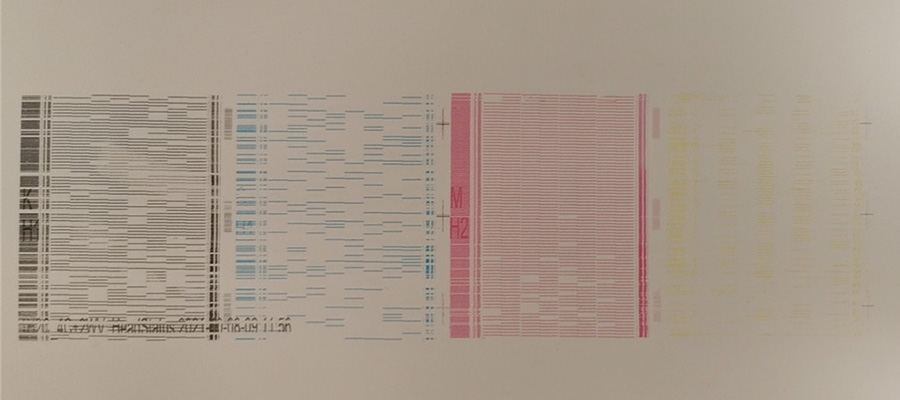
Before
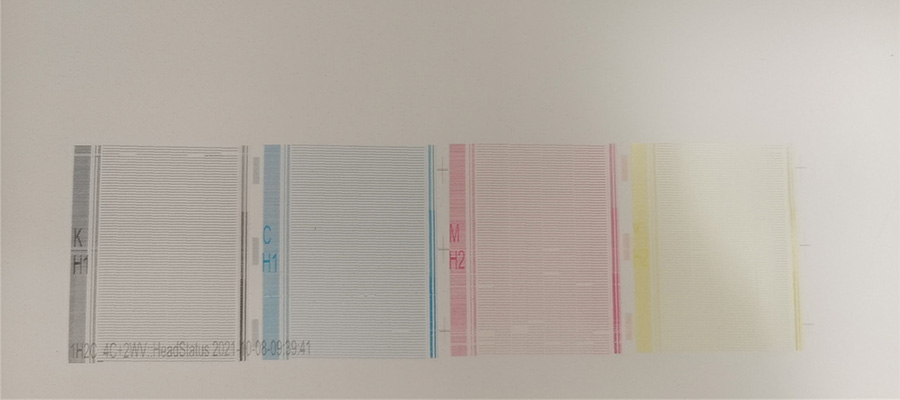
After
Post time: Nov-05-2021